Before And After: Curbless Shower Conversion
After
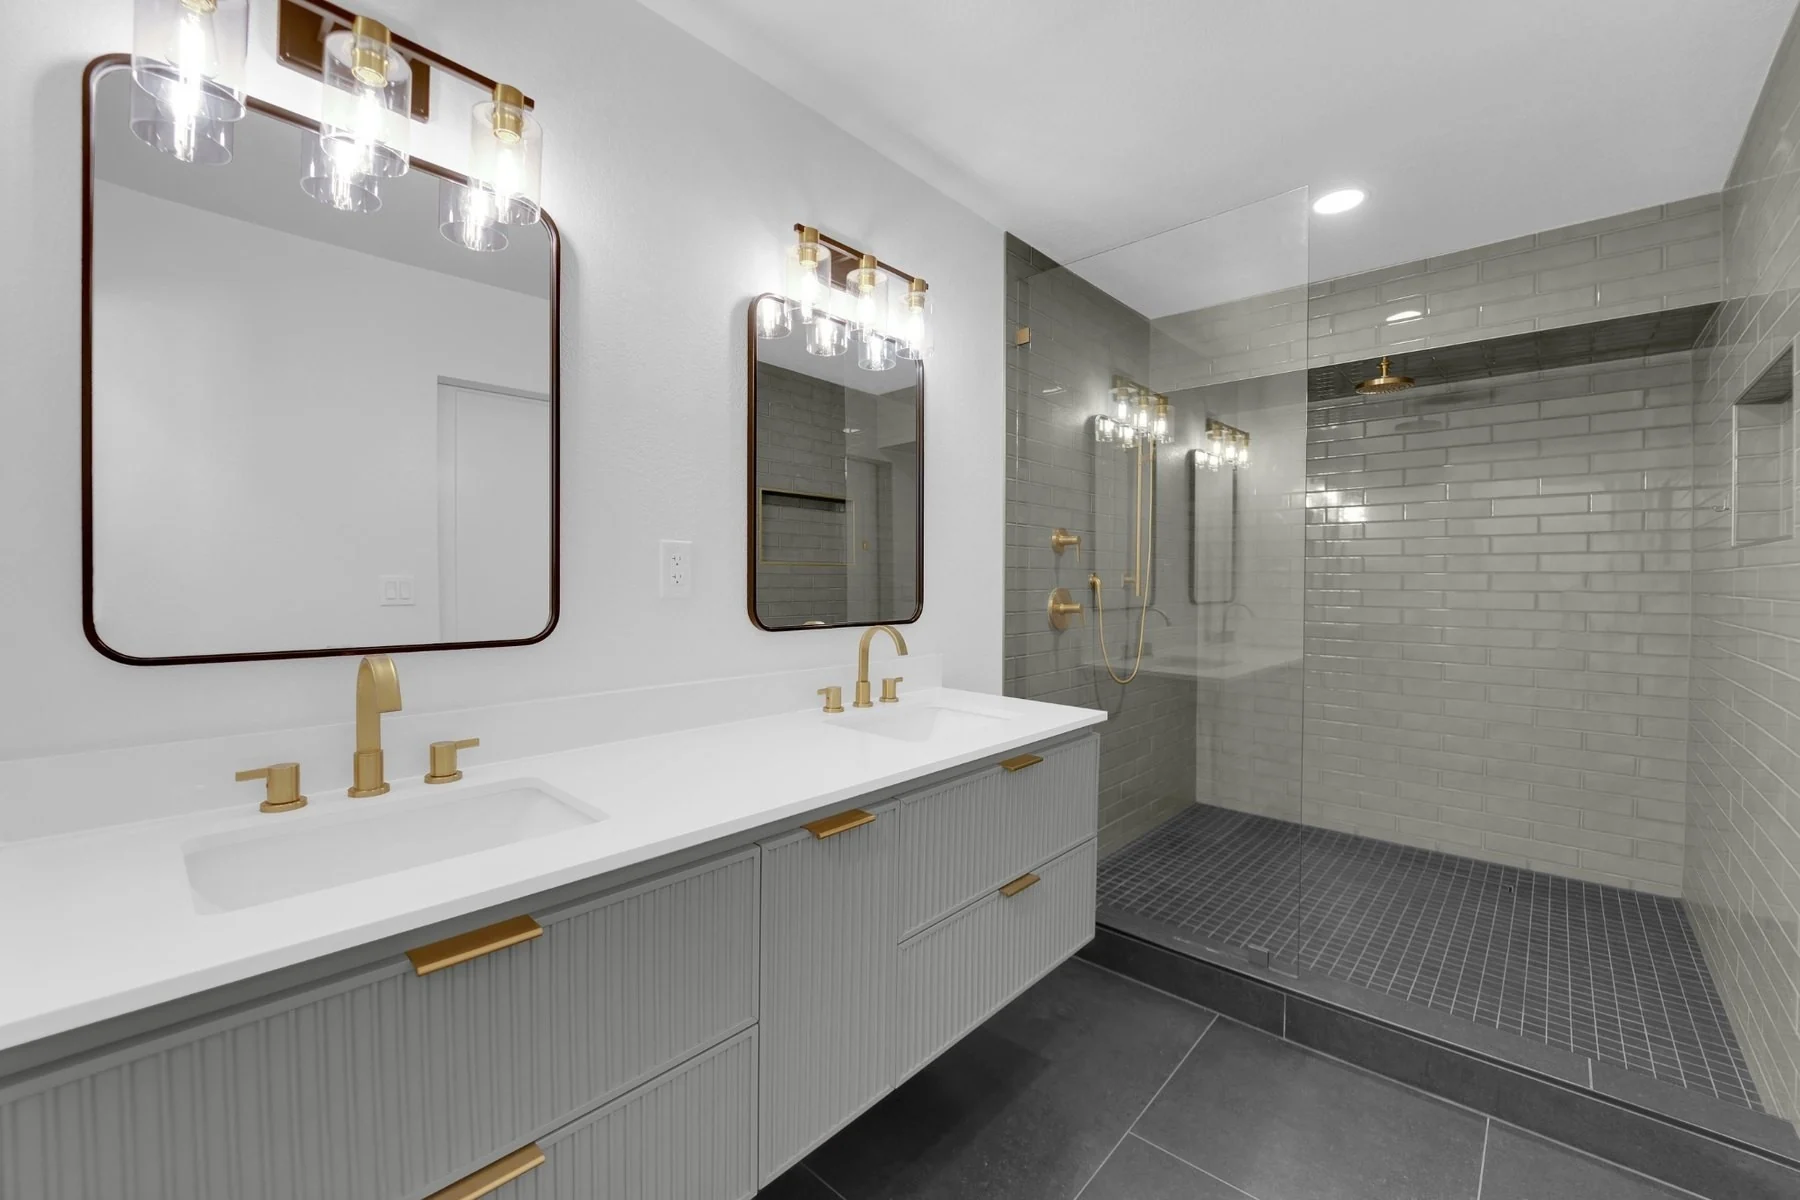
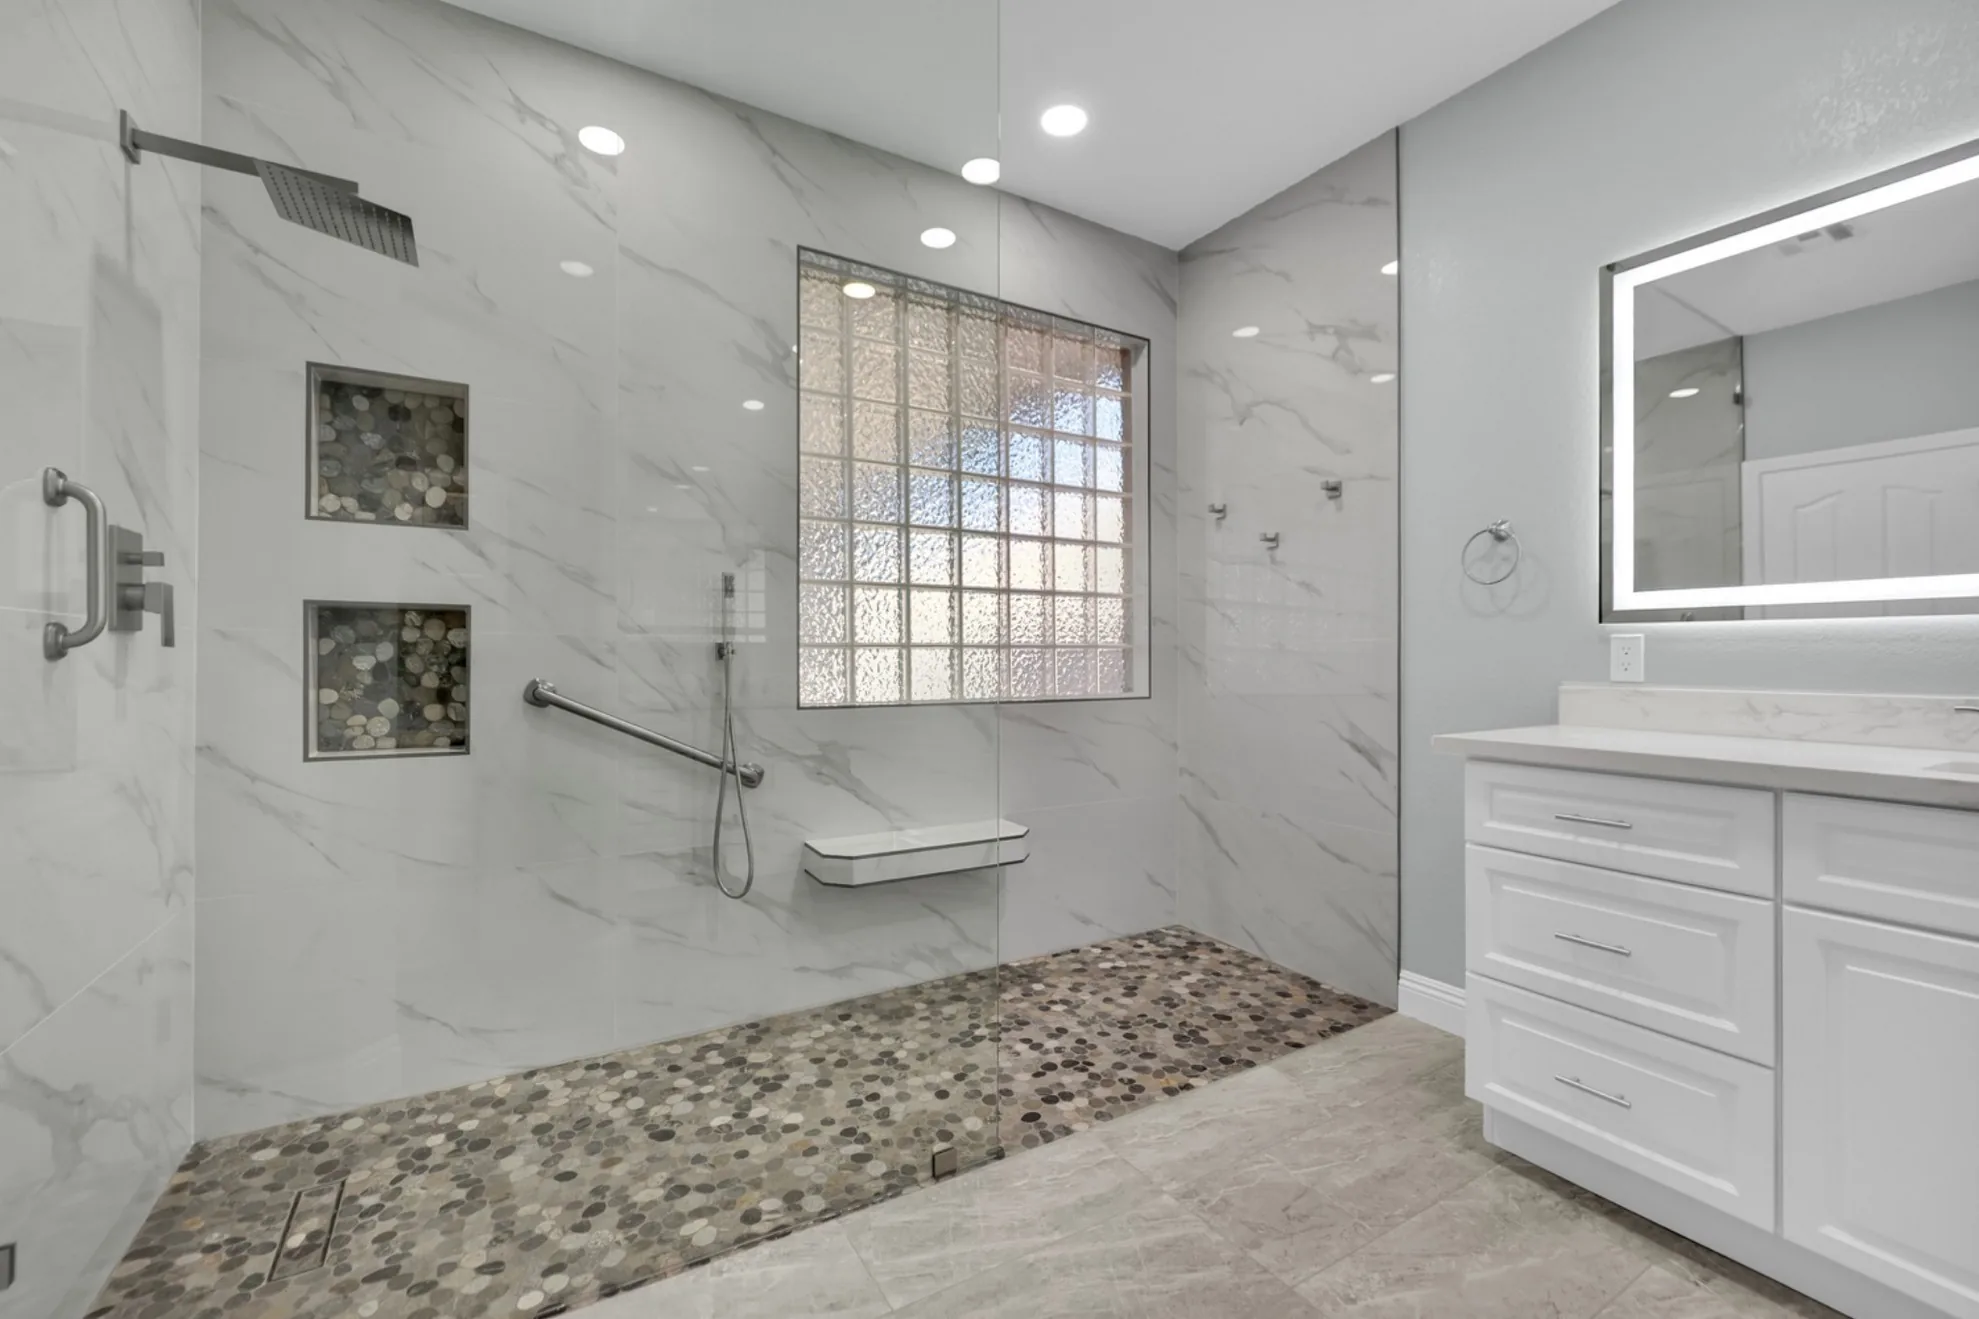
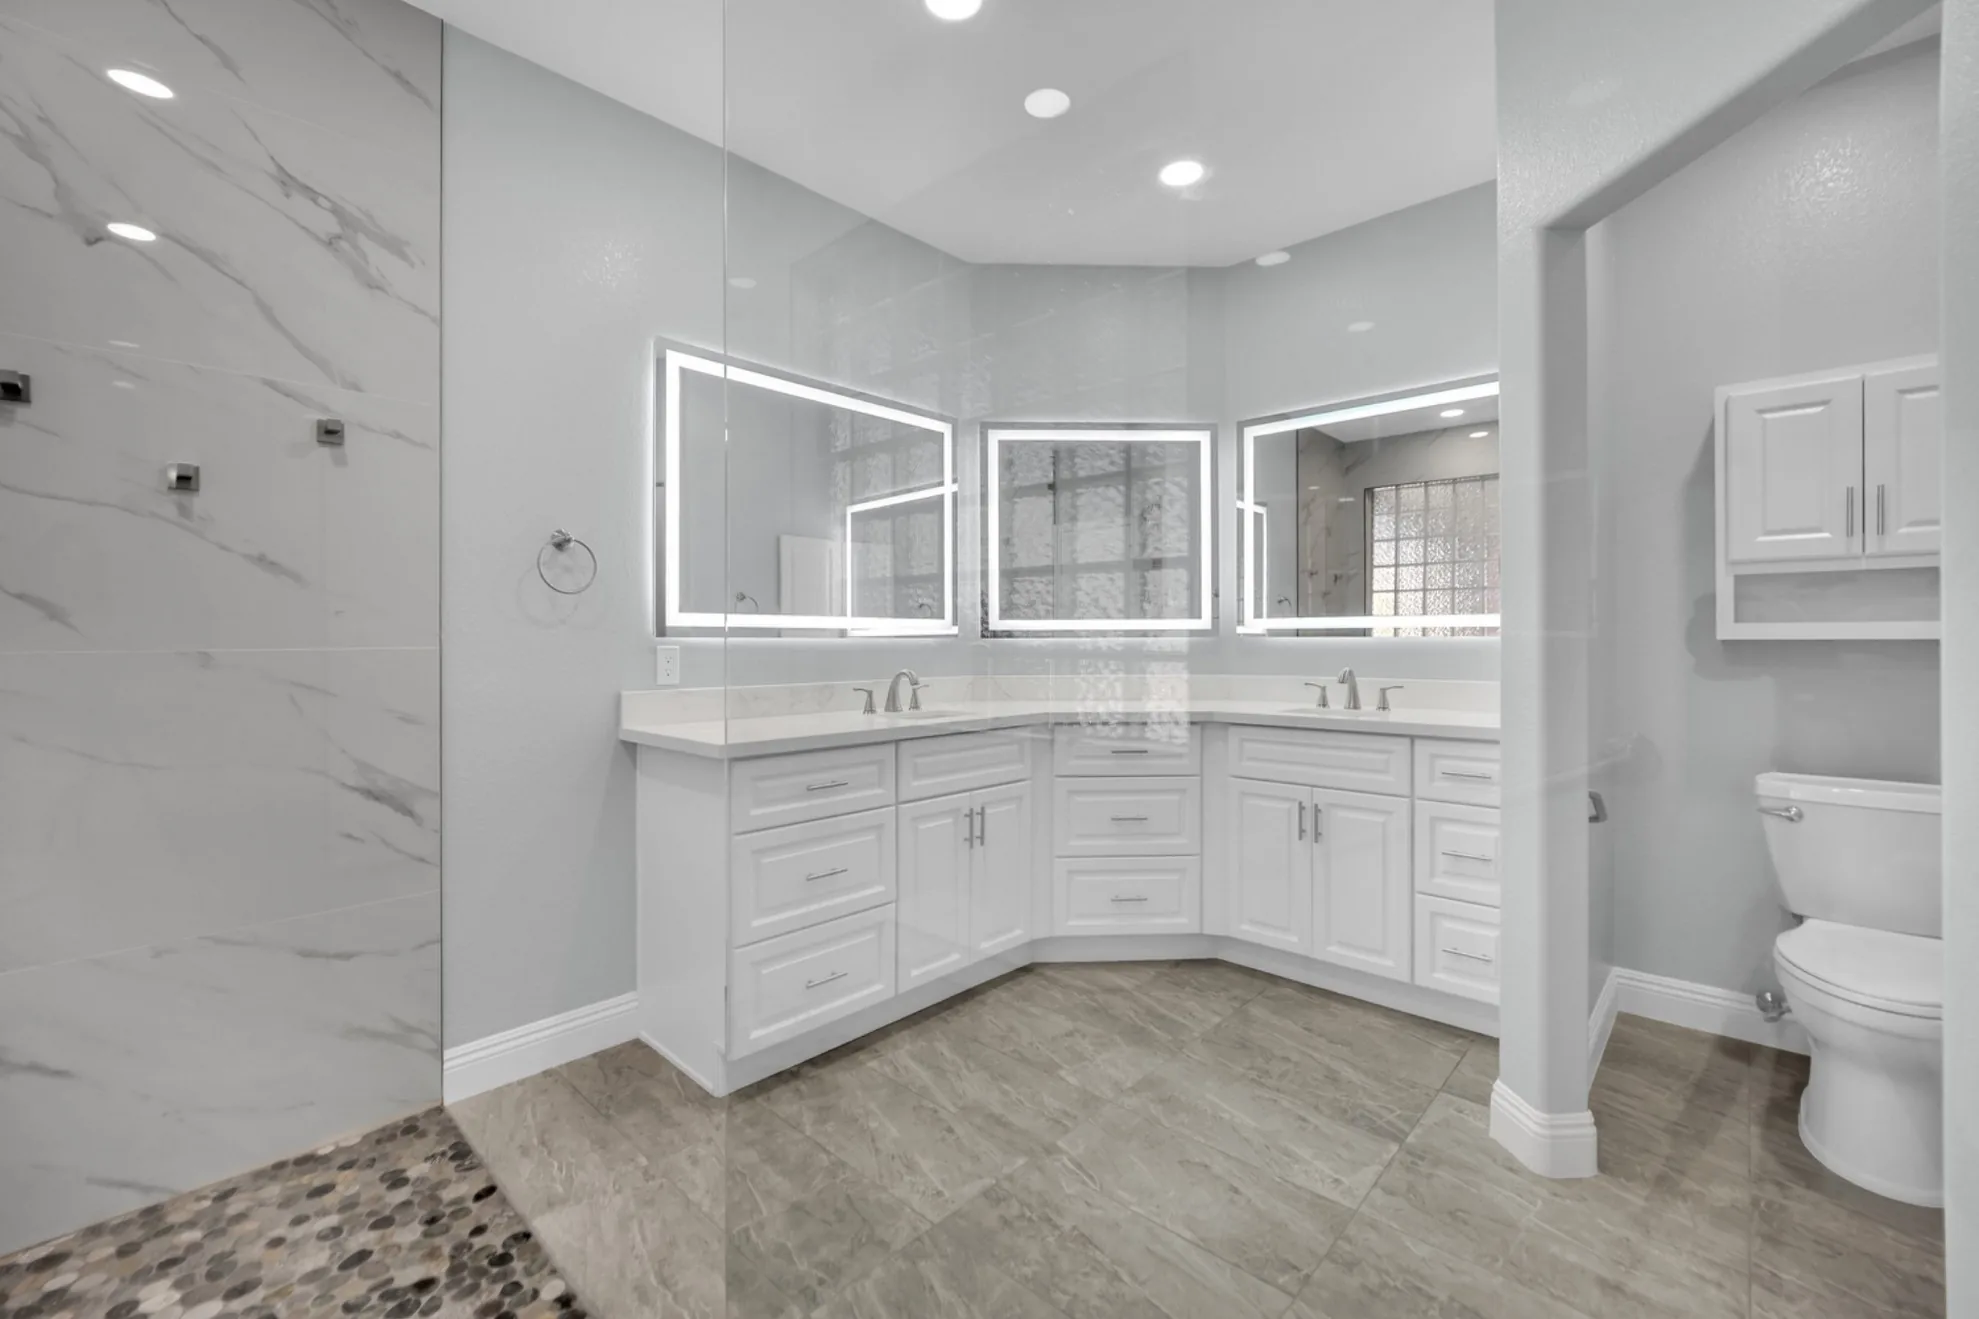
The finished bathroom adds a brighter curbless walk-in shower, relocated linear drain, pebble floor traction, reinforced grab bars, fixed glass, lighted mirrors, and white shaker vanity storage.
Construction Solution
Big Horn Remodeling removed the tub step-over, scanned the post-tension slab, lowered the shower floor, relocated the drain, rebuilt the waterproofed shower pan, reinforced grab-bar locations, and updated the vanity and lighting around a safer daily-use layout.
Completed Curbless Shower Conversion Case Study
Big Horn Remodeling completed this curbless walk-in shower conversion for an elderly couple who wanted to remove an older tub/shower combo and make the bathroom safer, brighter, and easier to use every day.
The project converted the old tub and shower combination into a curbless walk-in shower with a relocated linear drain, reinforced grab bars, pebble floor tile for traction, a floating bench, custom 3/8-inch fixed glass, lighted mirrors, semi-custom shaker vanities, and a brighter vanity area.
This page supports the main Las Vegas bathroom remodel services page by showing one completed project in detail instead of repeating a broad bathroom remodeling service page.
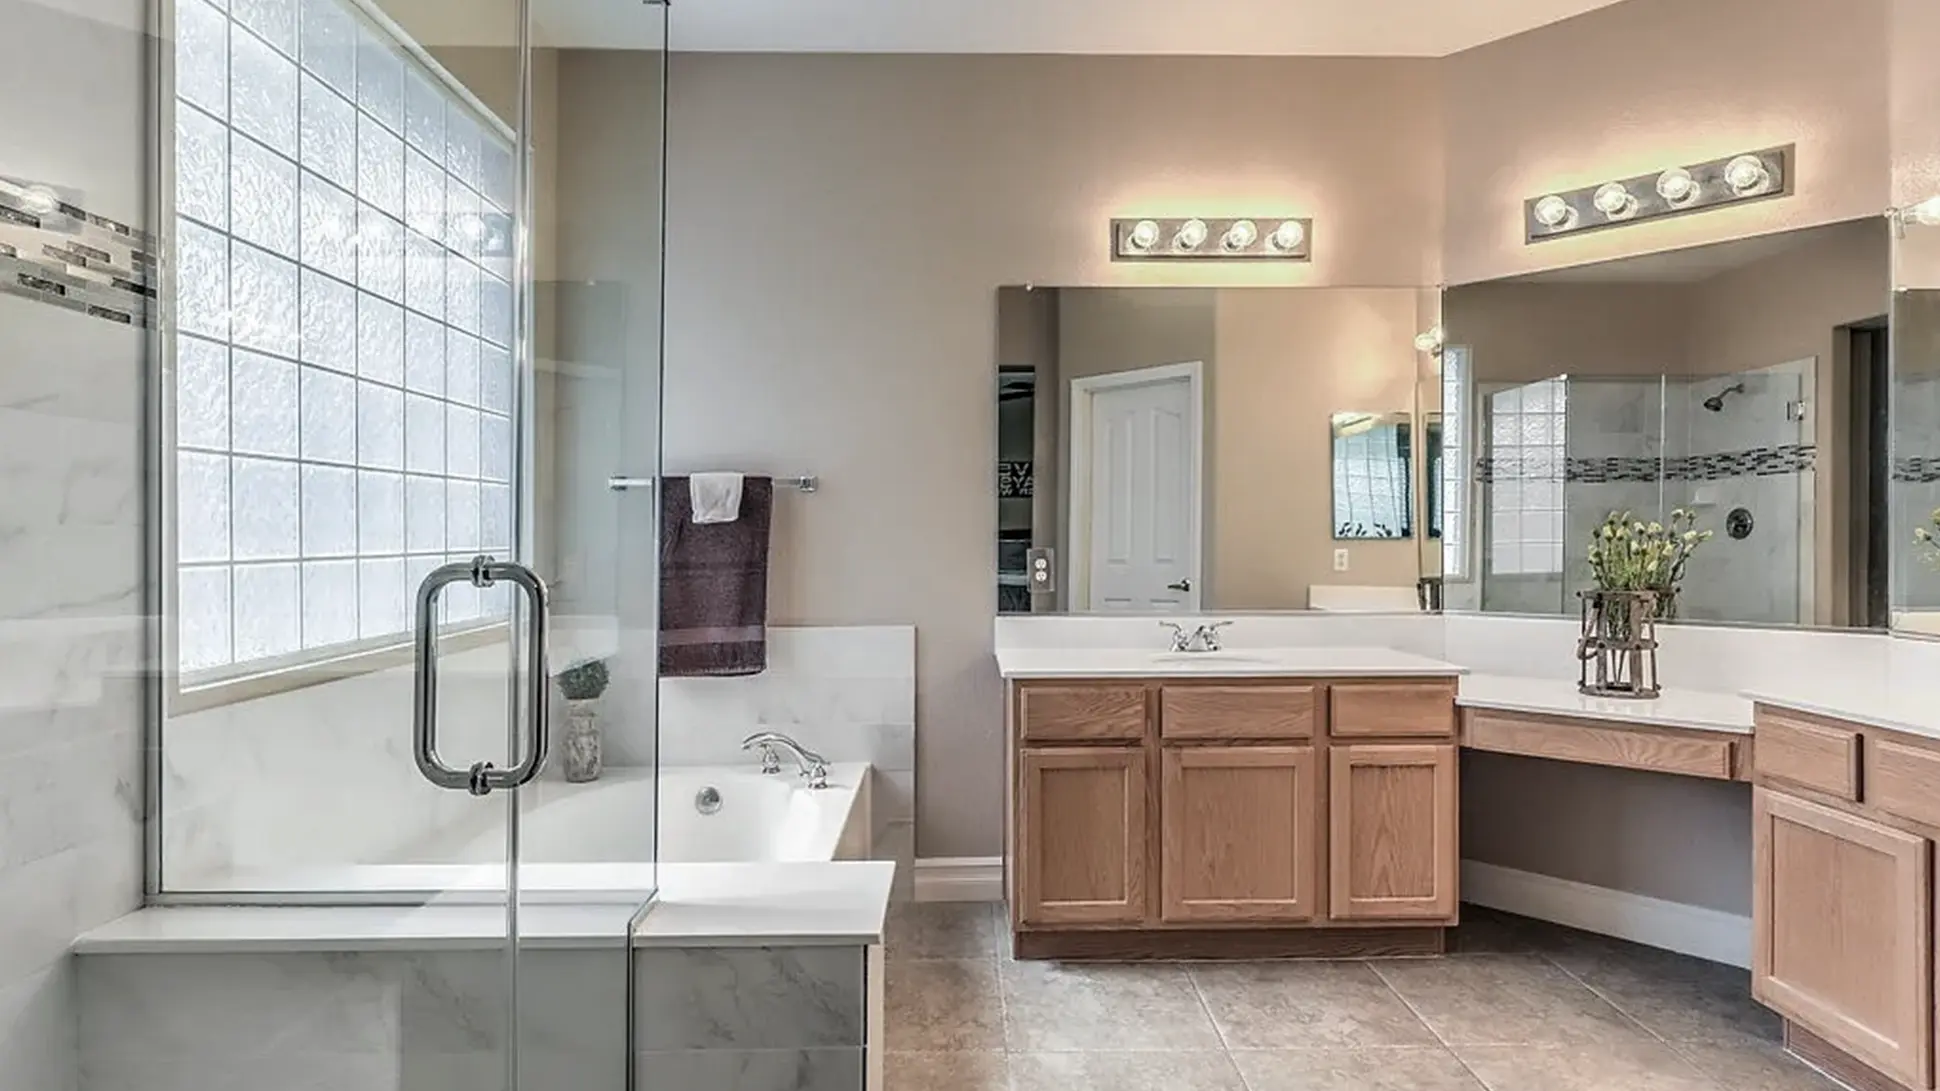
The Client Goal: Remove The Trip Hazard And Make The Shower Easier To Use
The homeowners were an elderly couple who wanted to make their bathroom safer and easier to use every day. The original setup required stepping over the side of the tub to enter the shower. That step-over had become a trip hazard.
Their top priority was a curbless shower entry. They did not want a traditional shower curb, and they did not want a door that would make the space feel tight. The new shower needed to be easier to enter, easier to stand in, and easier to bathe in with a handheld wand, bench, grab bars, and a floor surface with more traction underfoot.
The Challenge: A True Curbless Shower On A Post-Tension Slab
A curbless shower is not just a design choice. The floor height, drain location, shower pan slope, waterproofing transitions, glass layout, and surrounding bathroom floor all have to work together. In this home, the work was more technical because the bathroom sits on a post-tension concrete slab.
To create the curbless transition, Big Horn Remodeling scanned the slab before concrete work, then demoed the slab down approximately 2.5 inches and built the shower pan back up correctly. That created room for the drainage slope while keeping the shower entry flush with the bathroom floor.
Why was the slab lowered?
The slab was lowered about 2.5 inches so the shower pan could be rebuilt with proper slope while still creating a curbless entry. Because the home had a post-tension slab, Big Horn Remodeling scanned the concrete before demo work and drain relocation.
The Plan: Safer Entry, Better Drainage, More Traction, And Cleaner Storage
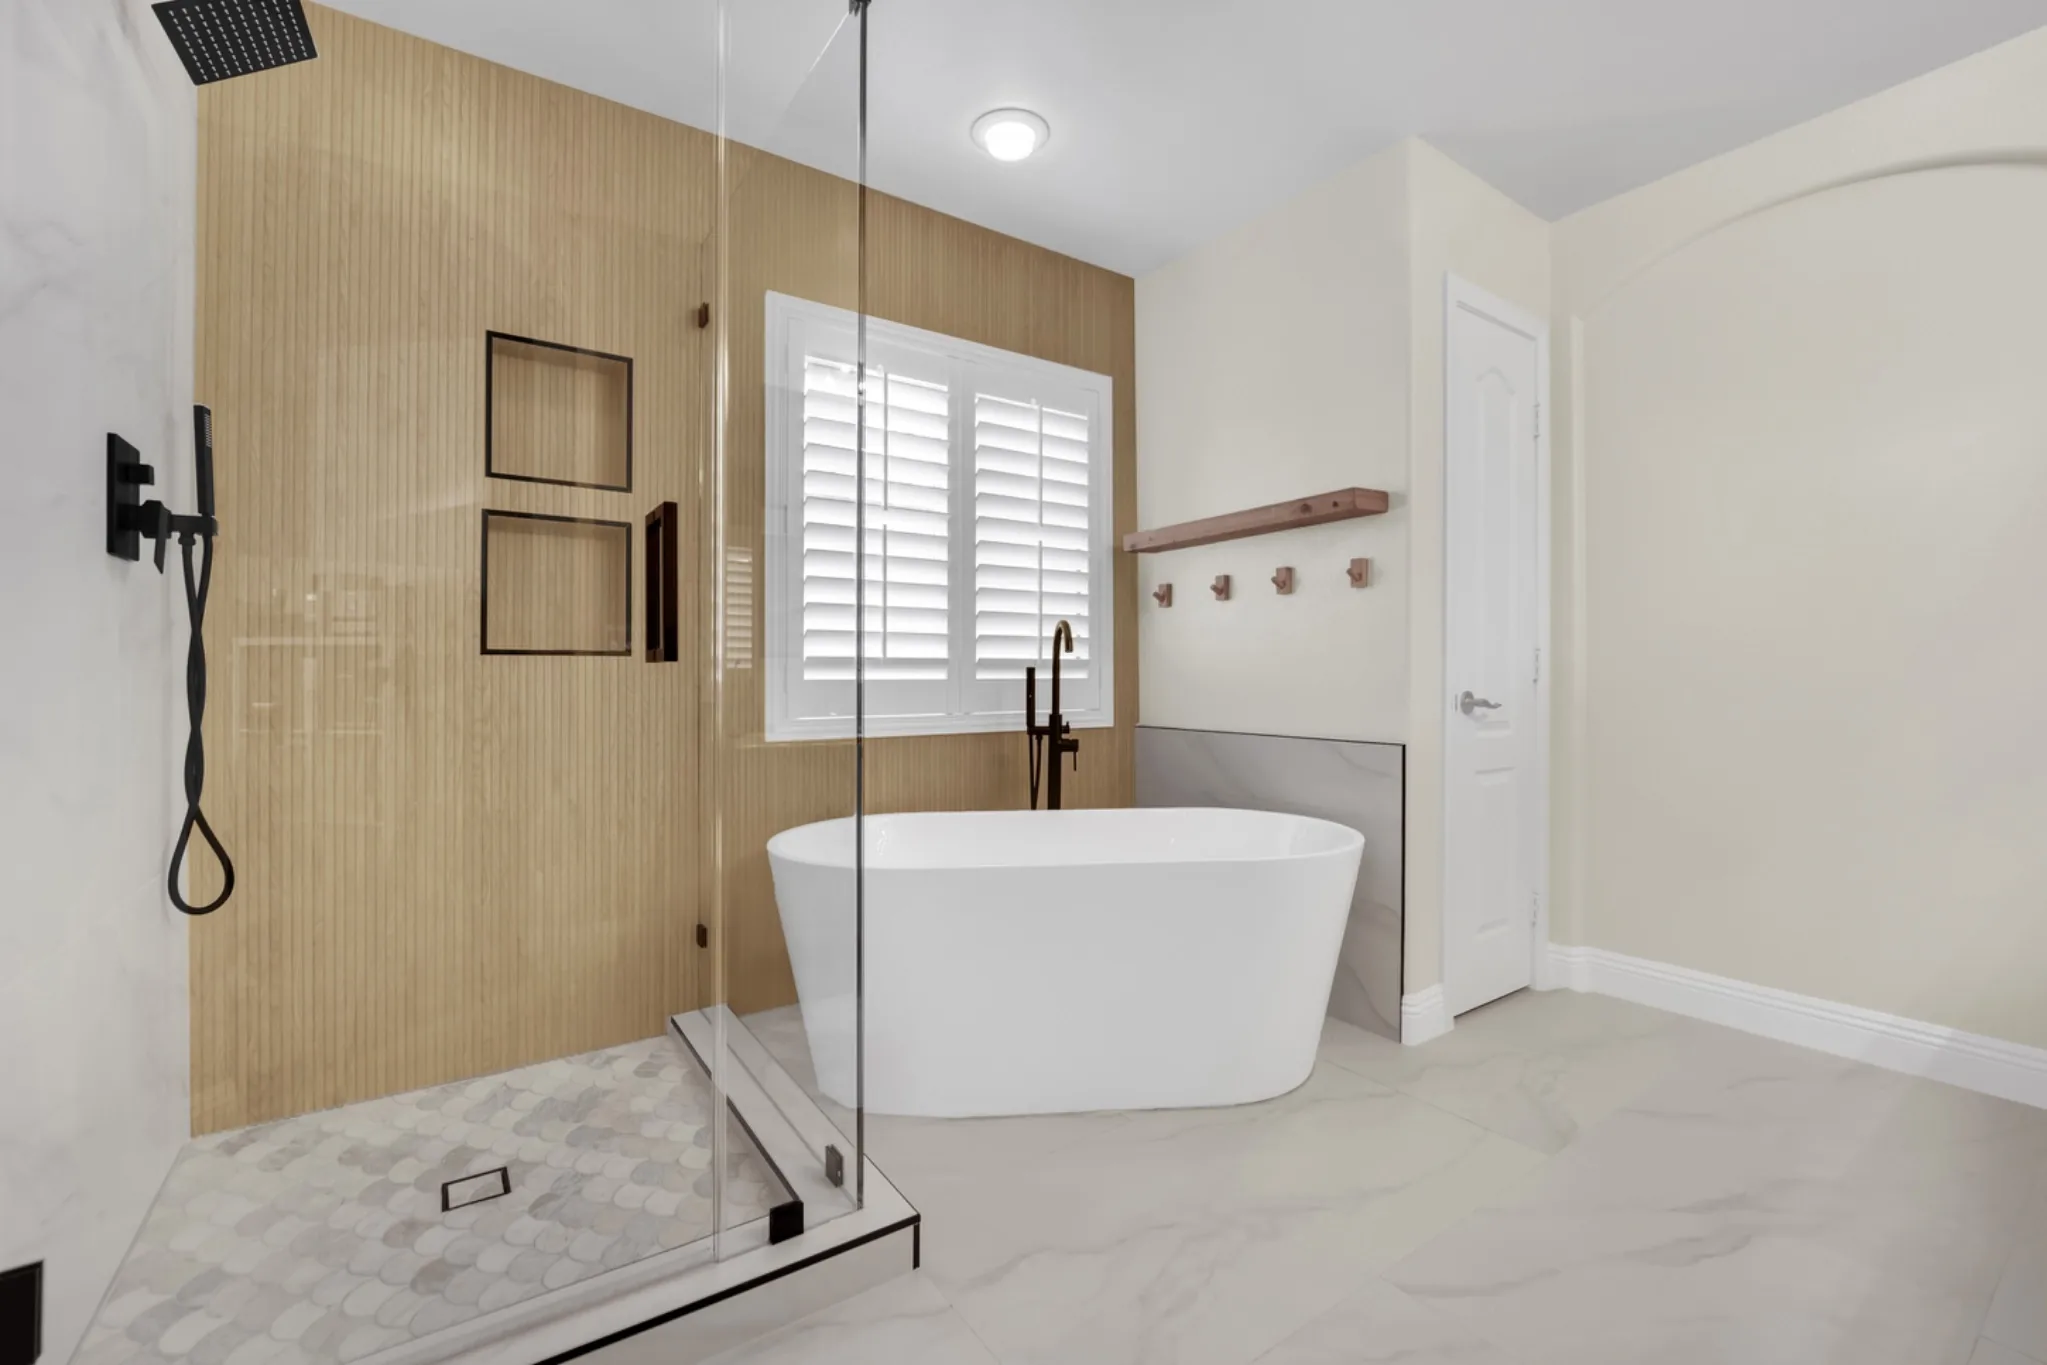
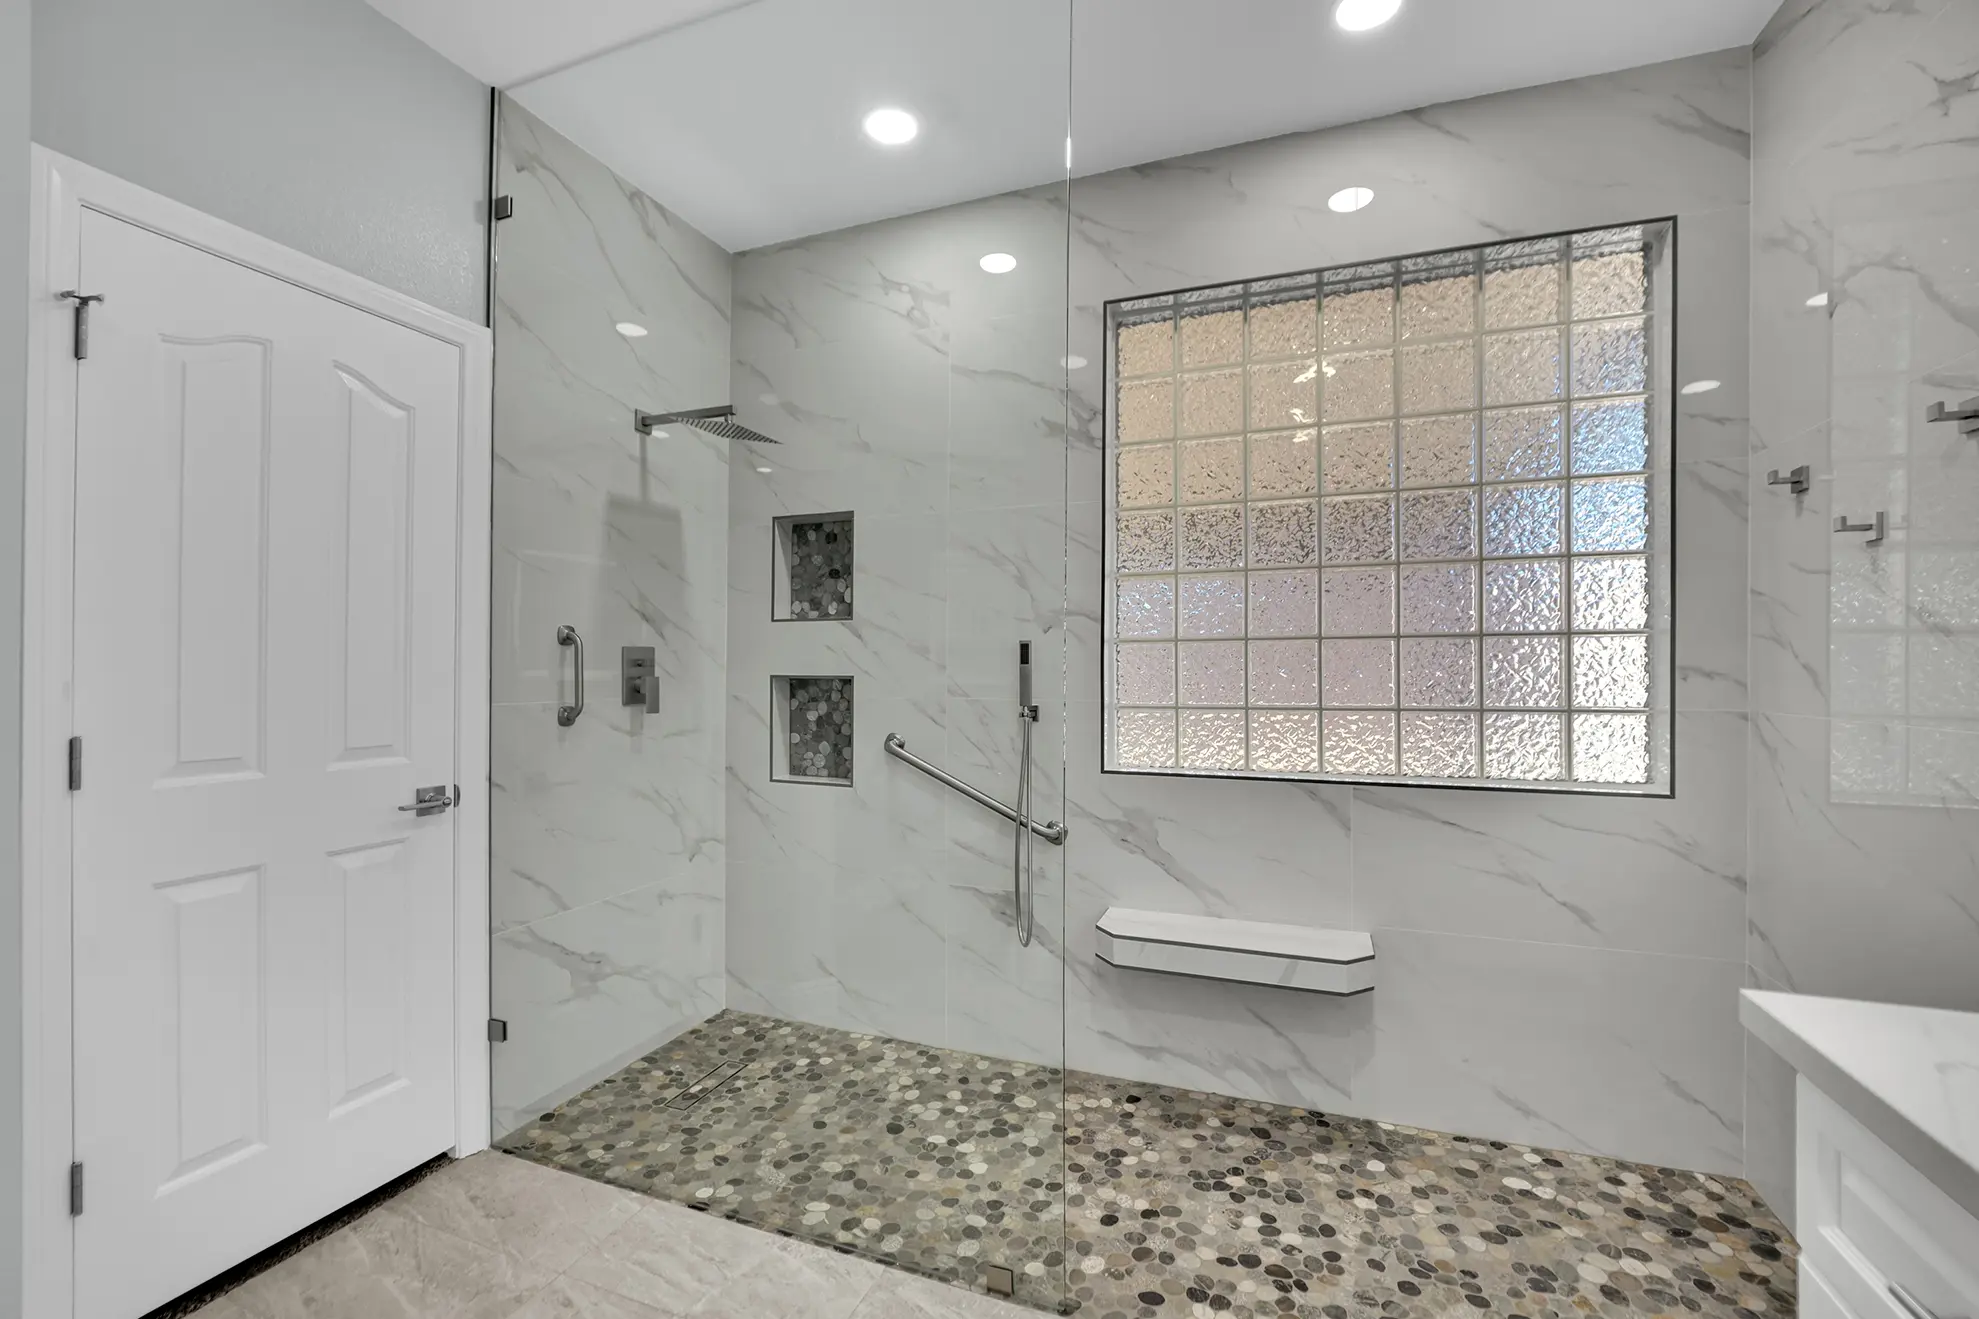
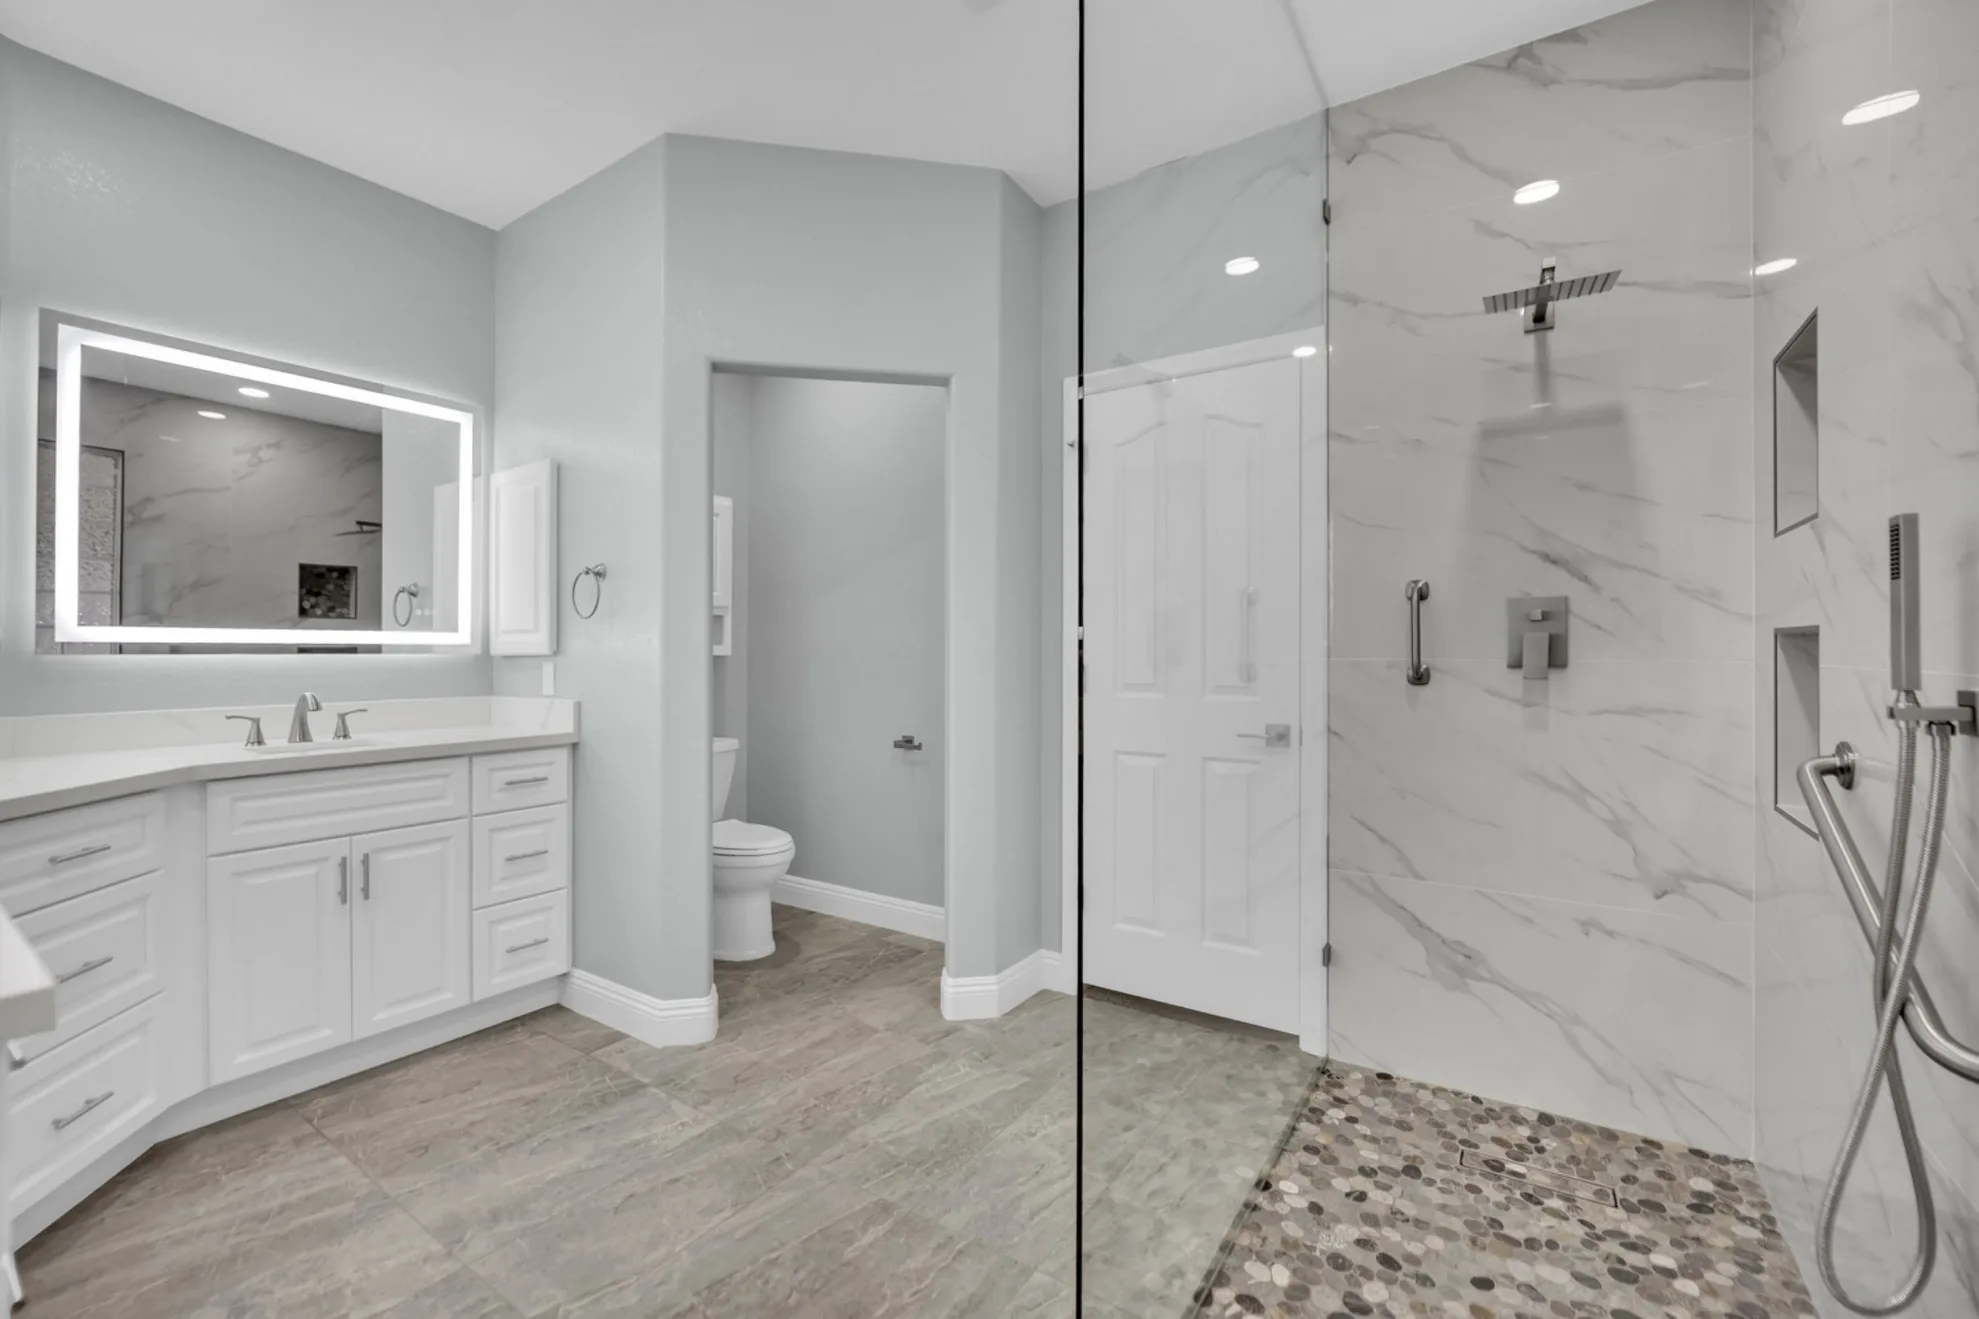
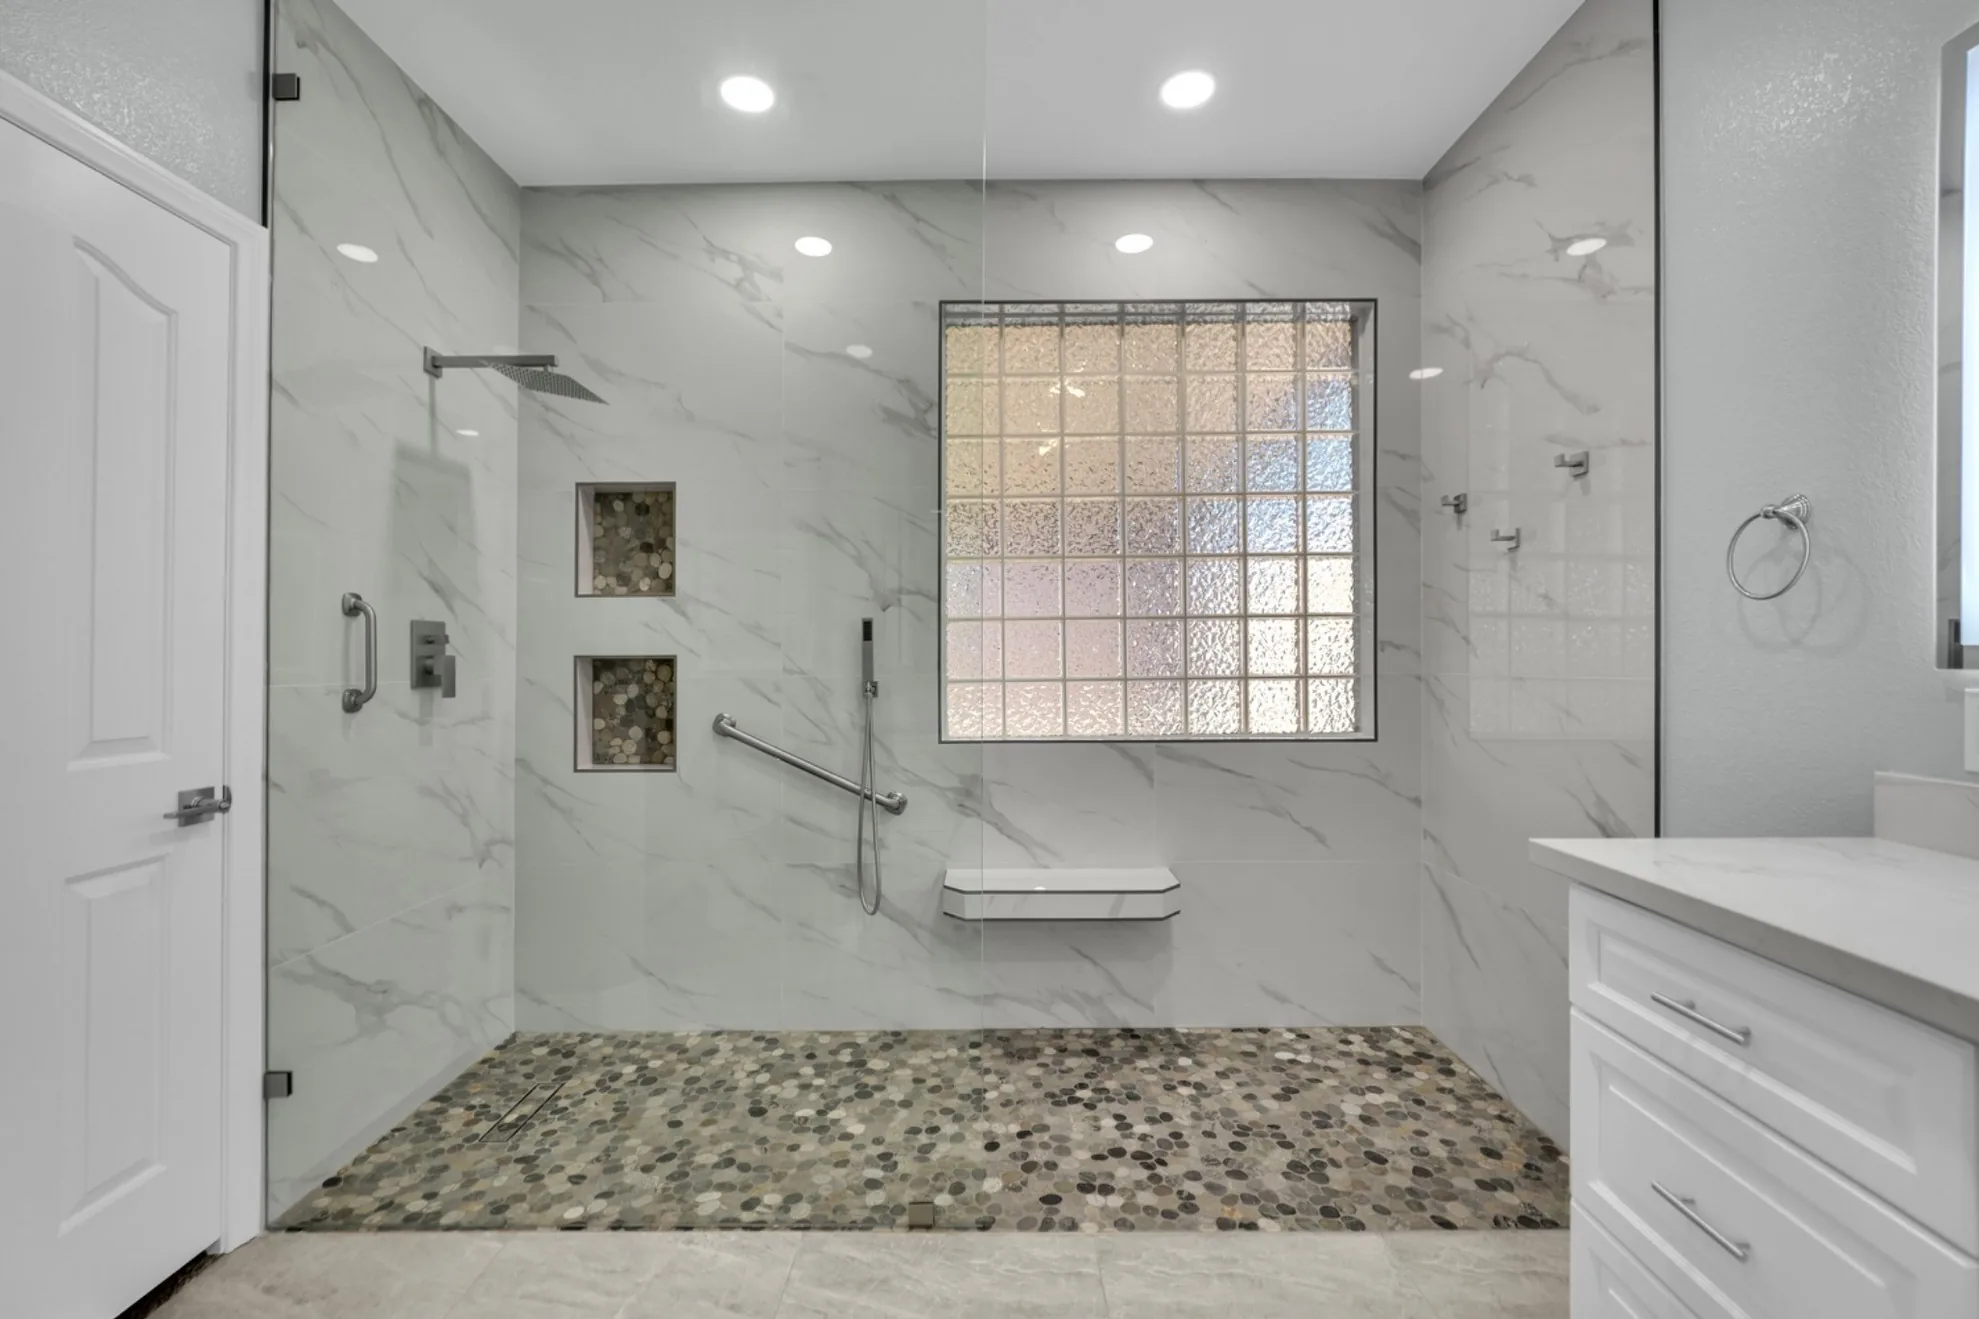
The new shower was designed around daily usability. The curb was eliminated, the tub was removed, and the shower became an open walk-in area with a fixed glass panel. Marble-look porcelain tile kept the shower bright, while pebble floor tile added extra grout lines and traction.
Aging-in-place usability
Curbless entry, no shower door, grab bars, a floating bench, and handheld shower wand made the bathroom easier to use without making it feel institutional.
Clean finish direction
Marble-look porcelain, pebble flooring, fixed glass, lighted mirrors, shaker vanities, and quartz gave the room a bright, custom look.
Technical Scope Of Work
The technical scope included demolition, slab scanning, slab lowering, drain relocation, shower pan construction, waterproofing, tile, glass, lighting, and vanity upgrades. The project required plumbing and electrical permits because the work changed hidden systems, not just finish materials.
For homeowners comparing similar scopes, the tub-to-shower conversion cost guide explains why custom tile, drain relocation, waterproofing, and slab conditions can change the scope.
Why The Linear Drain Was Moved
The drain location was planned around comfort, not just plumbing convenience. A drain placed in the wrong spot can be something the homeowner steps on every time they shower. On this project, the linear drain was relocated so the standing area felt more comfortable.
The drain also included a hair catcher, which makes routine cleaning easier and helps protect drainage performance over time.
Why Pebble Tile Was Used On The Shower Floor
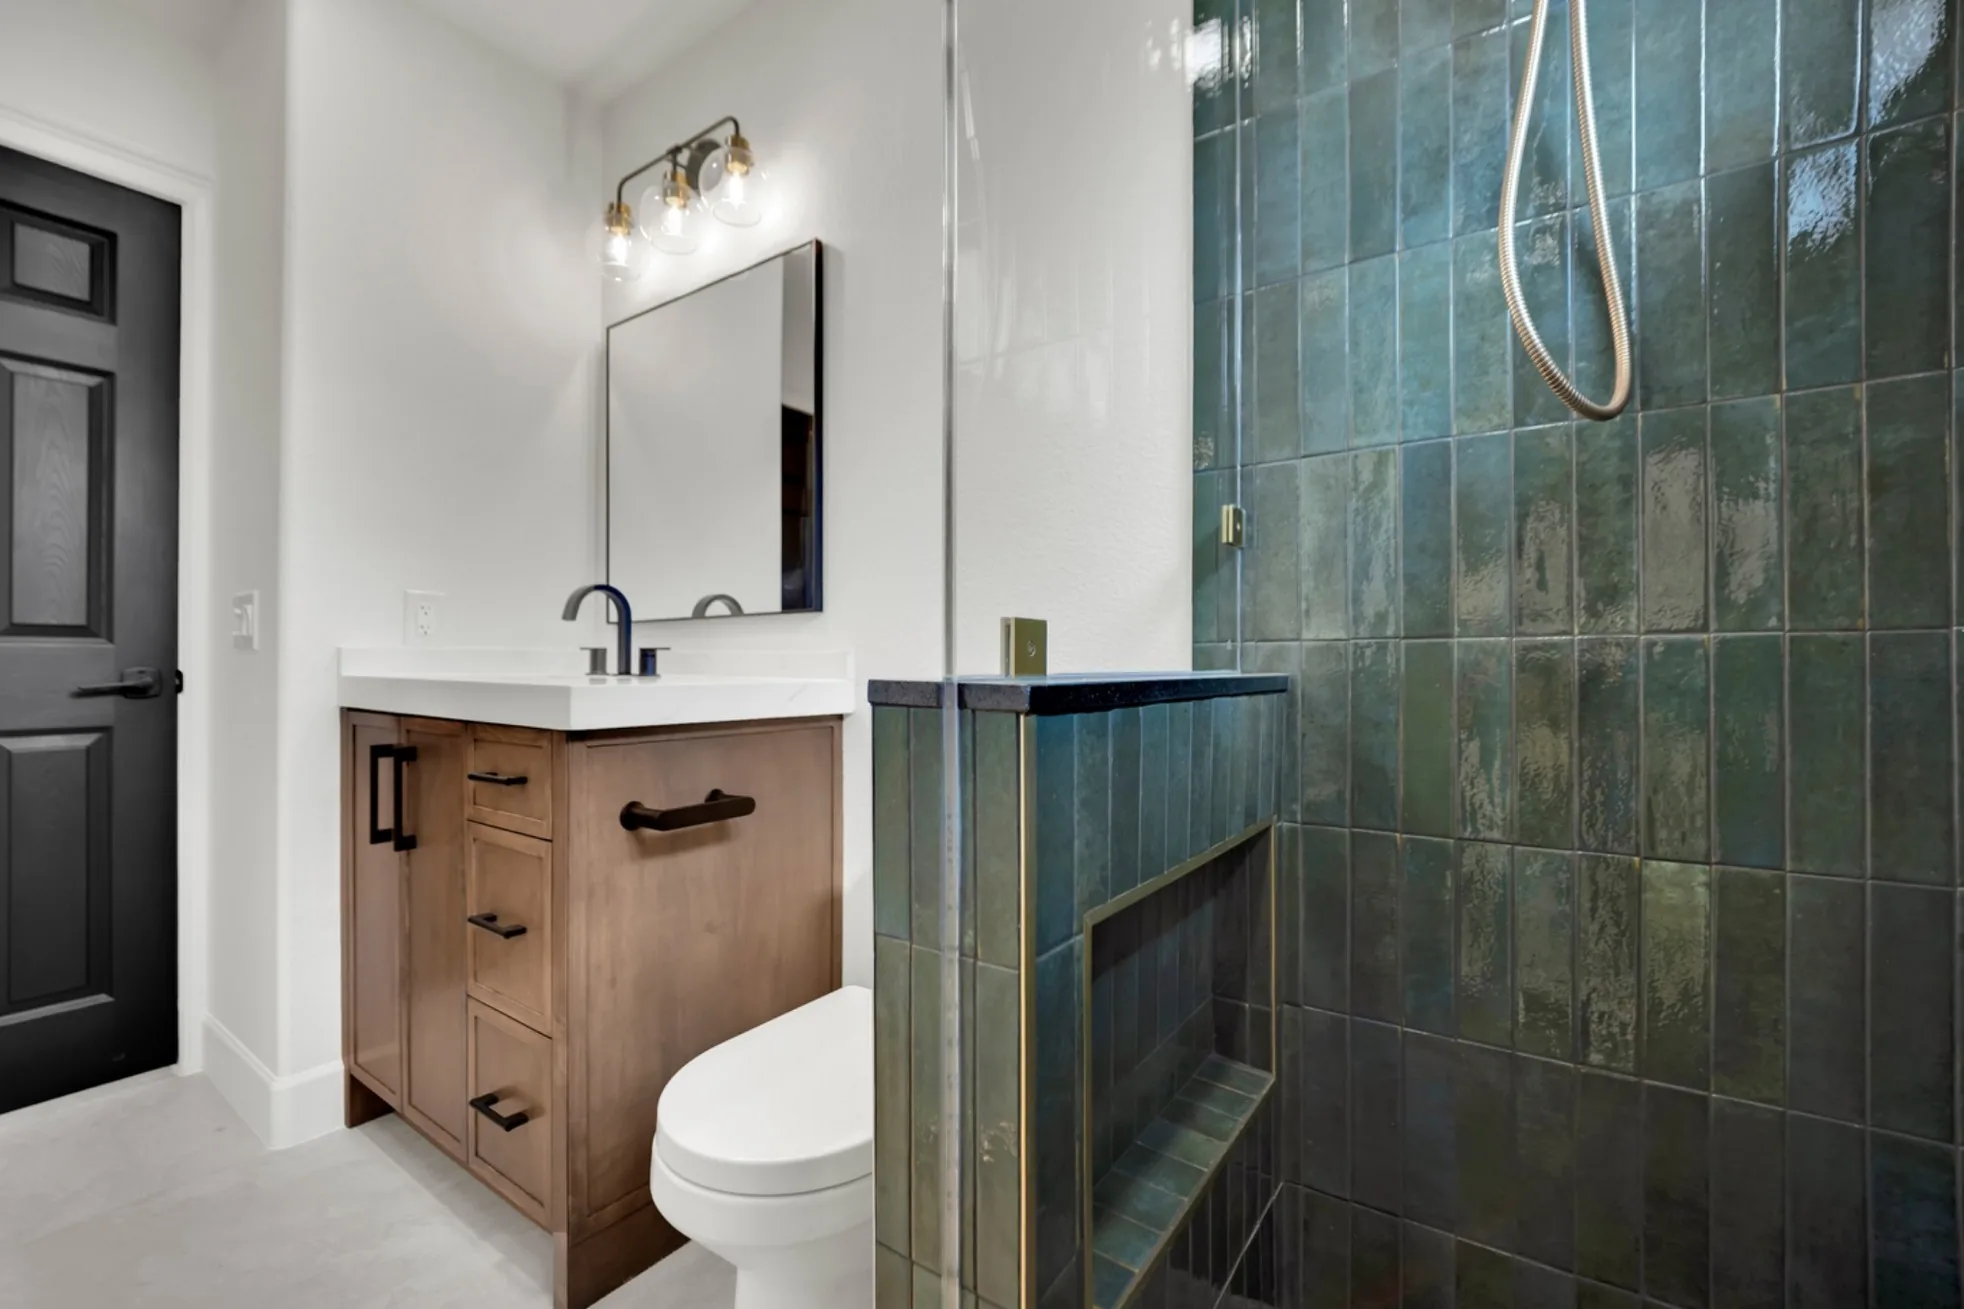
The homeowners wanted traction. A large-format shower floor can look clean, but it has fewer grout joints. For this project, small pebble tile was chosen because it creates more grout lines underfoot. That texture and grout pattern helped support the accessibility goal of reducing slip risk in a wet shower area.
For more design planning around benches, handheld wands, grab-bar backing, niches, waterproofing, and glass, see the walk-in shower planning guide.
Accessibility And Aging-In-Place Details
- Curbless entry so the homeowners no longer had to step over a tub or shower curb.
- No shower door, keeping the entry open and easier to navigate.
- Pebble shower floor selected for additional grout lines and traction.
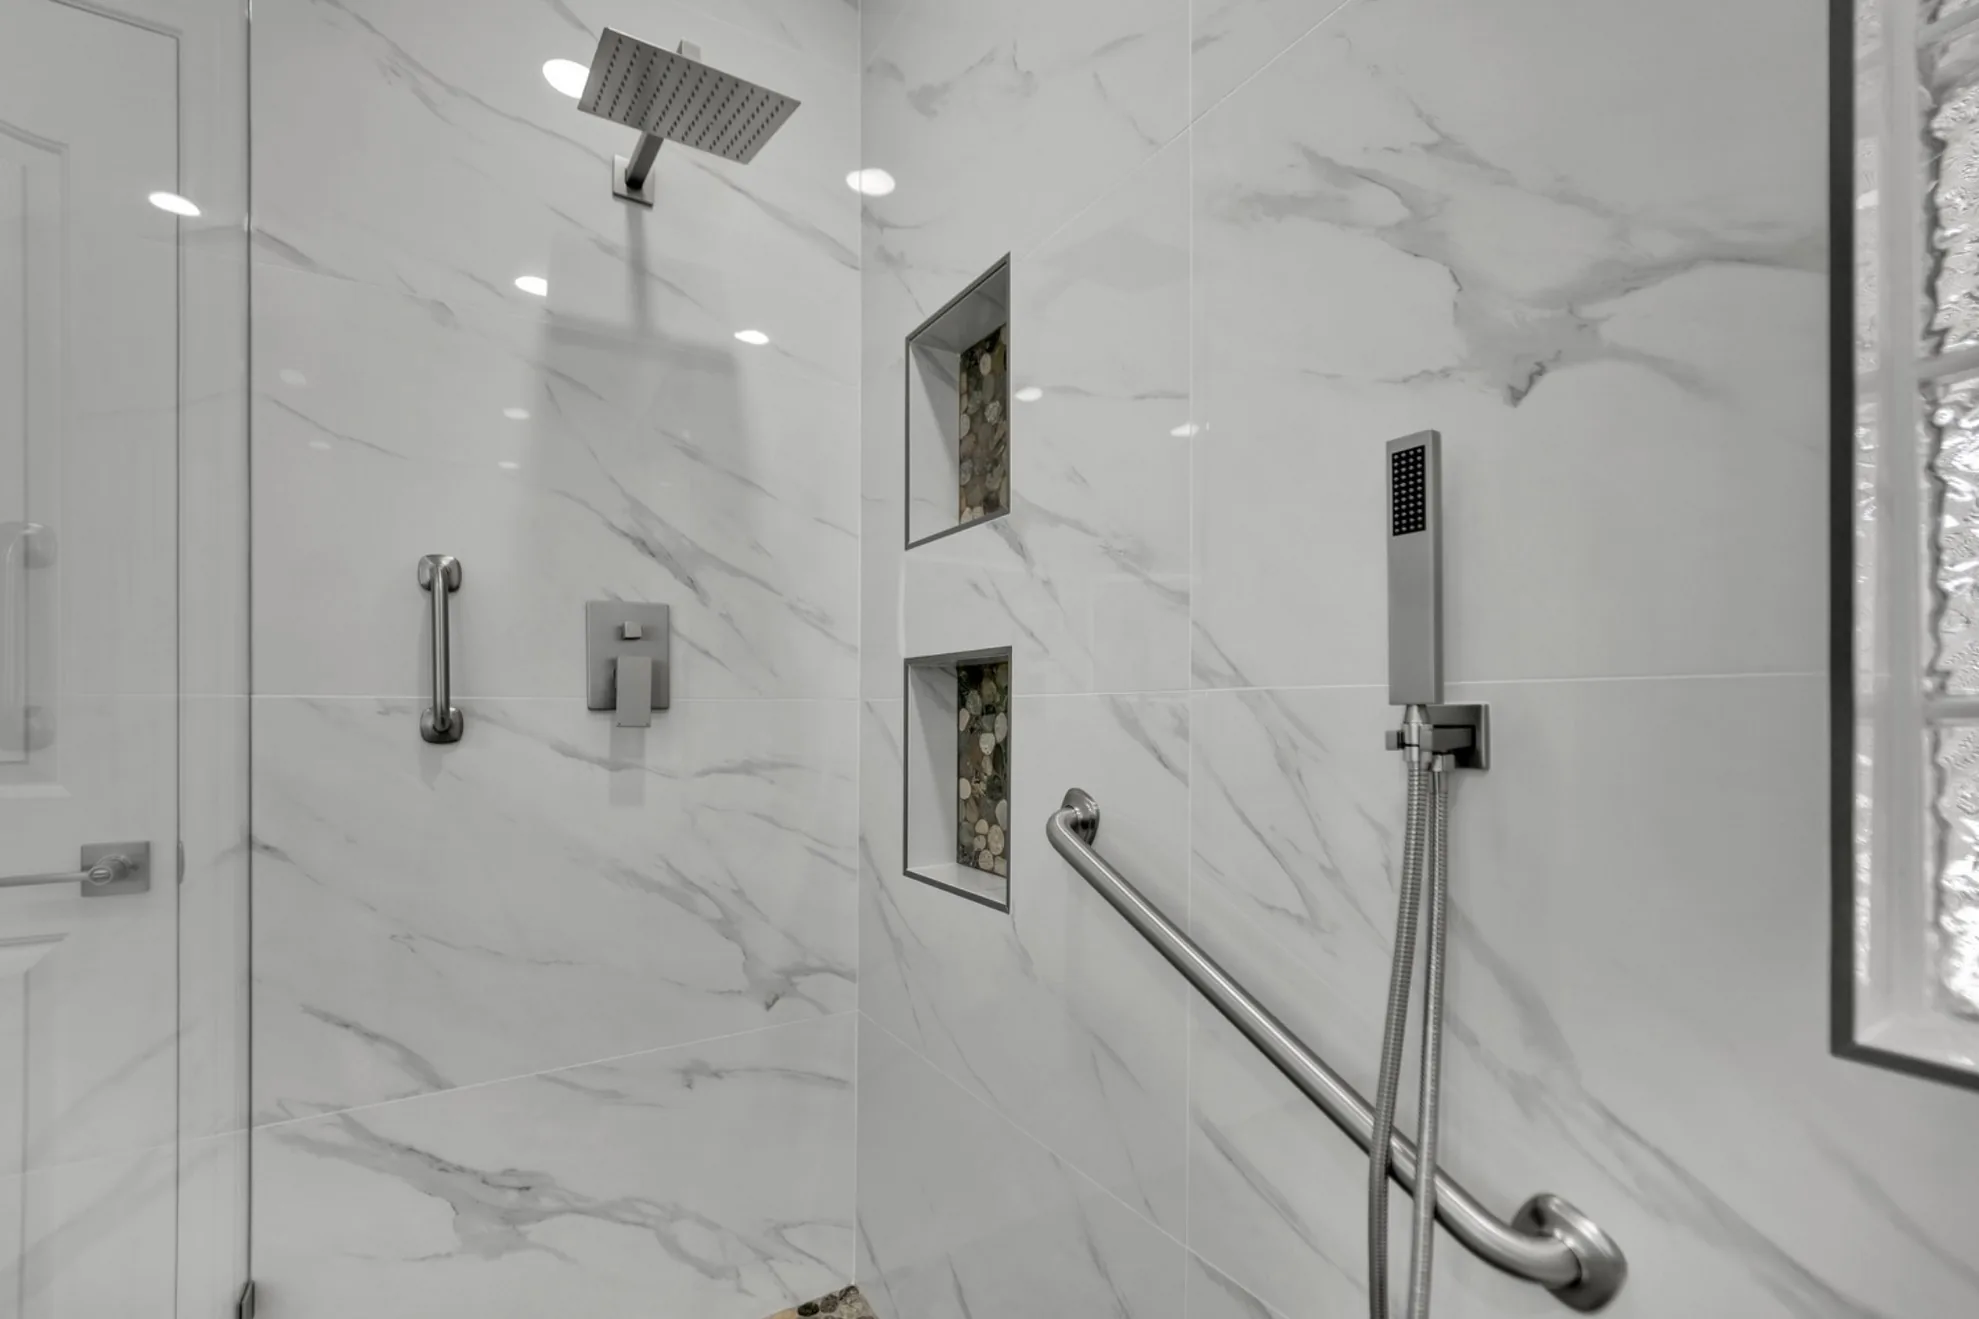
- Grab bars installed with wood reinforcement behind the tile.
- Floating bench mounted with metal brackets into studs.
- Bench corners softened to avoid sharp edges in the shower.
- Handheld shower wand for easier bathing and rinsing.
- Relocated linear drain to keep the standing area more comfortable.
- Additional lighting and lighted mirrors to make the bathroom brighter.
- Towel hooks added for convenient access after showering.
Materials And Finish Selections
The finish package balanced safety, cleaning, storage, and a bright visual direction. The shower used marble-look porcelain walls, pebble tile flooring, AquaDefense and Kerdi waterproofing details, a relocated linear drain, custom fixed glass, a floating bench, reinforced grab bars, and a brighter vanity area.

Timeline: Approx. 20 Days Of Active Construction
The project took approximately 20 days of active construction. The schedule included demolition, slab scanning, concrete work, plumbing relocation, electrical updates, shower pan work, waterproofing, tile installation, vanity/countertop installation, glass coordination, mirror installation, finish trim, and punch-list completion.
Preconstruction
Scope review, finish selections, permit planning, material coordination, and safety/accessibility planning.
Demo and verification
Removed the tub/shower combo, opened the work area, scanned the post-tension slab, and confirmed slab/drain conditions.
Rough work
Lowered the slab approximately 2.5 inches, relocated the drain, handled plumbing/electrical rough-in, and added recessed can lighting.
Shower build
Built the shower pan, waterproofed with AquaDefense and Kerdi details, reinforced grab-bar areas, and prepared bench support.
Tile and finishes
Installed porcelain wall tile, pebble floor tile, niches, bench, vanity, quartz top, mirrors, fixtures, and towel hooks.
Glass and final punch
Installed the floor-to-ceiling 3/8-inch fixed glass panel, completed final detailing, cleanup, and walkthrough.
For broader planning around bathroom remodel budgets and schedule expectations, use the bathroom remodel cost guide.
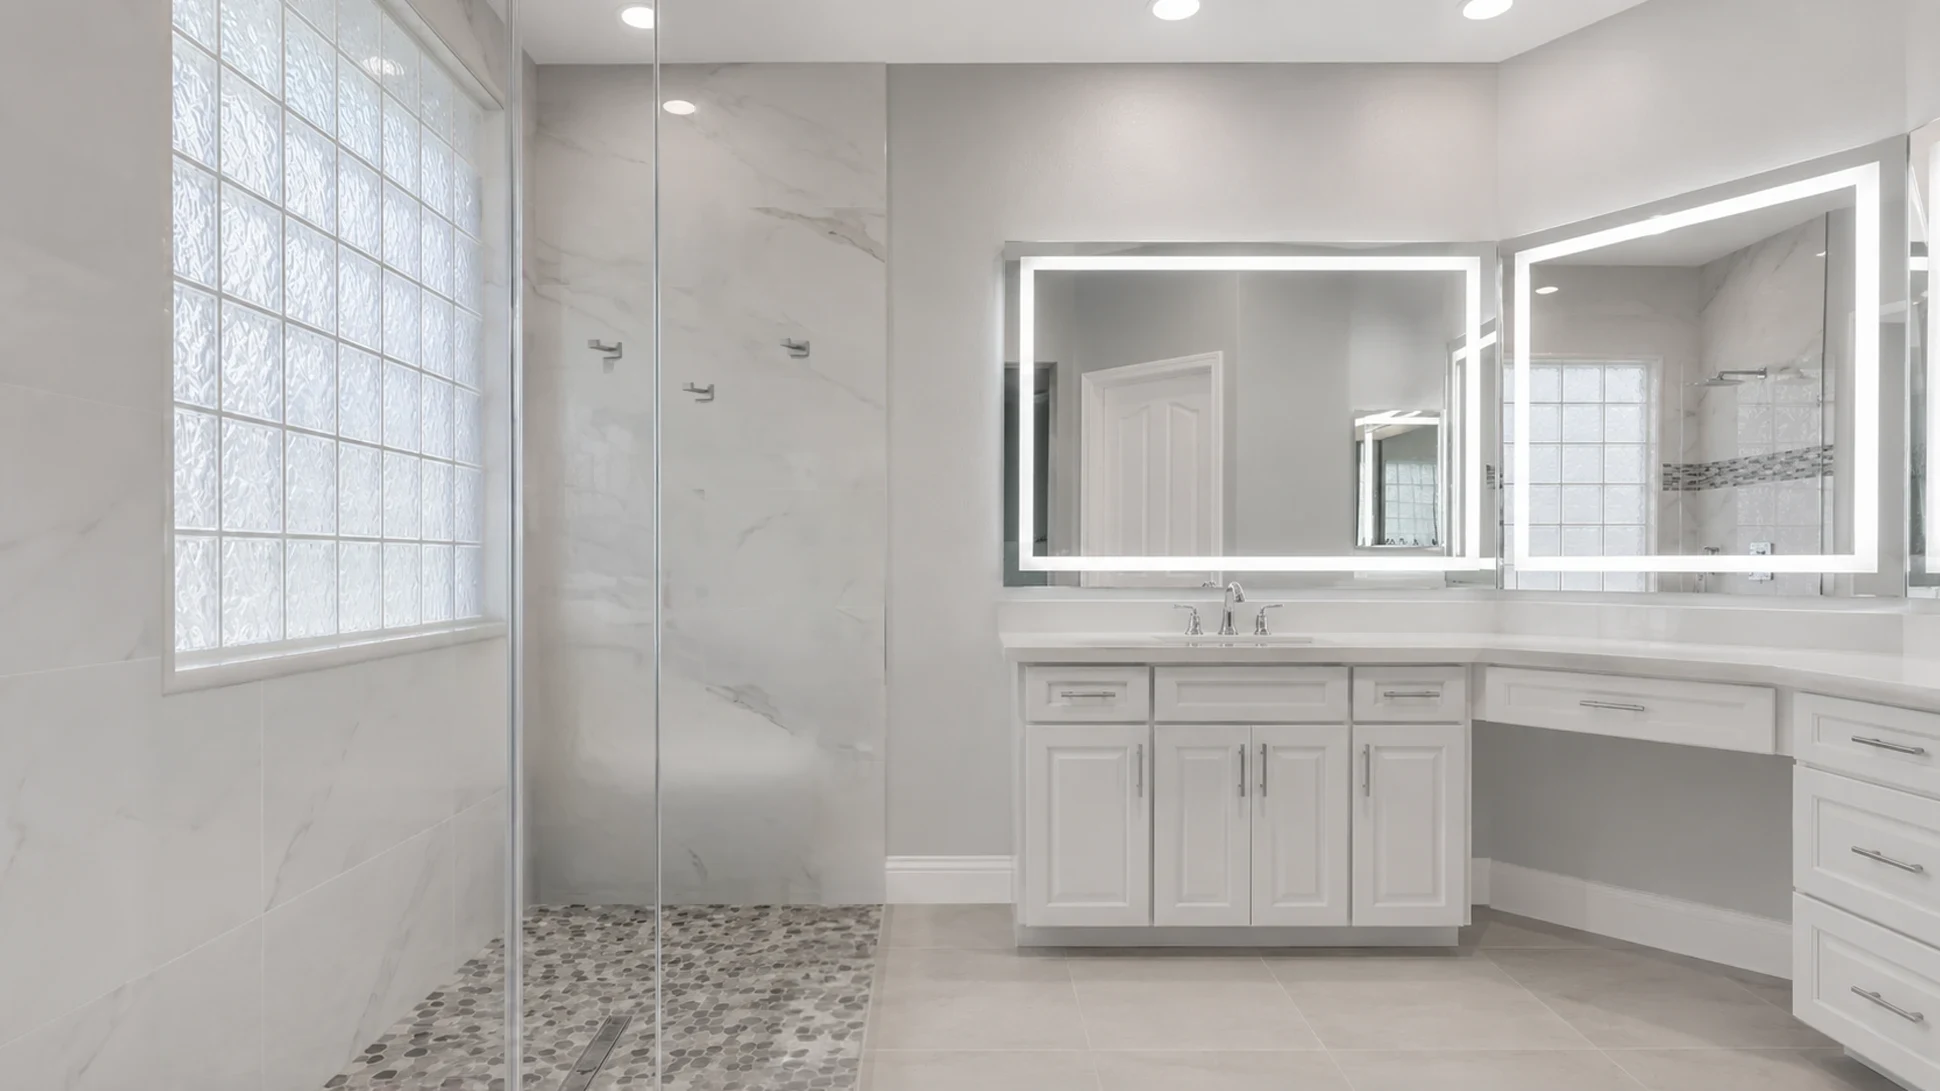
Finished Result: Brighter, Safer, More Open, And Easier To Use
The finished bathroom is brighter, safer, more open, and more modern. The homeowners especially loved the bench and the curbless shower. The new layout removed the tub step-over and shower curb, added better lighting, increased storage, and gave the room a cleaner custom look while still focusing on practical day-to-day safety.
The project now gives the homeowners a shower that is easier to enter, easier to use, and easier to maintain. The fixed glass panel keeps the shower open visually, the pebble floor supports traction, the handheld wand improves usability, and the reinforced grab bars provide support where it matters.
Project Location Map
This project was completed in the Lone Mountain area of Las Vegas. The exact address is withheld for client privacy.
Project completed in the Lone Mountain area of Las Vegas. Exact address withheld for client privacy.
Hidden system work
The scope included post-tension slab scanning, concrete lowering, drain relocation, plumbing coordination, shower pan construction, waterproofing, and permit coordination.
Lighting upgrades
Added recessed can lighting and lighted mirrors made the bathroom brighter and easier to use.
Secure supports
Grab bars were installed over wood backing, and the floating bench was mounted back to studs with metal brackets.
Safety-led finish plan
Curbless entry, pebble floor texture, no door, fixed glass, and a handheld wand all supported day-to-day usability.
Planning a safer curbless walk-in shower?
Big Horn Remodeling can review your existing tub or shower, slab conditions, drain location, waterproofing needs, glass layout, and accessibility goals before demolition starts.